1.3 Quick Access
1.3.1 Activate Industry Solutions
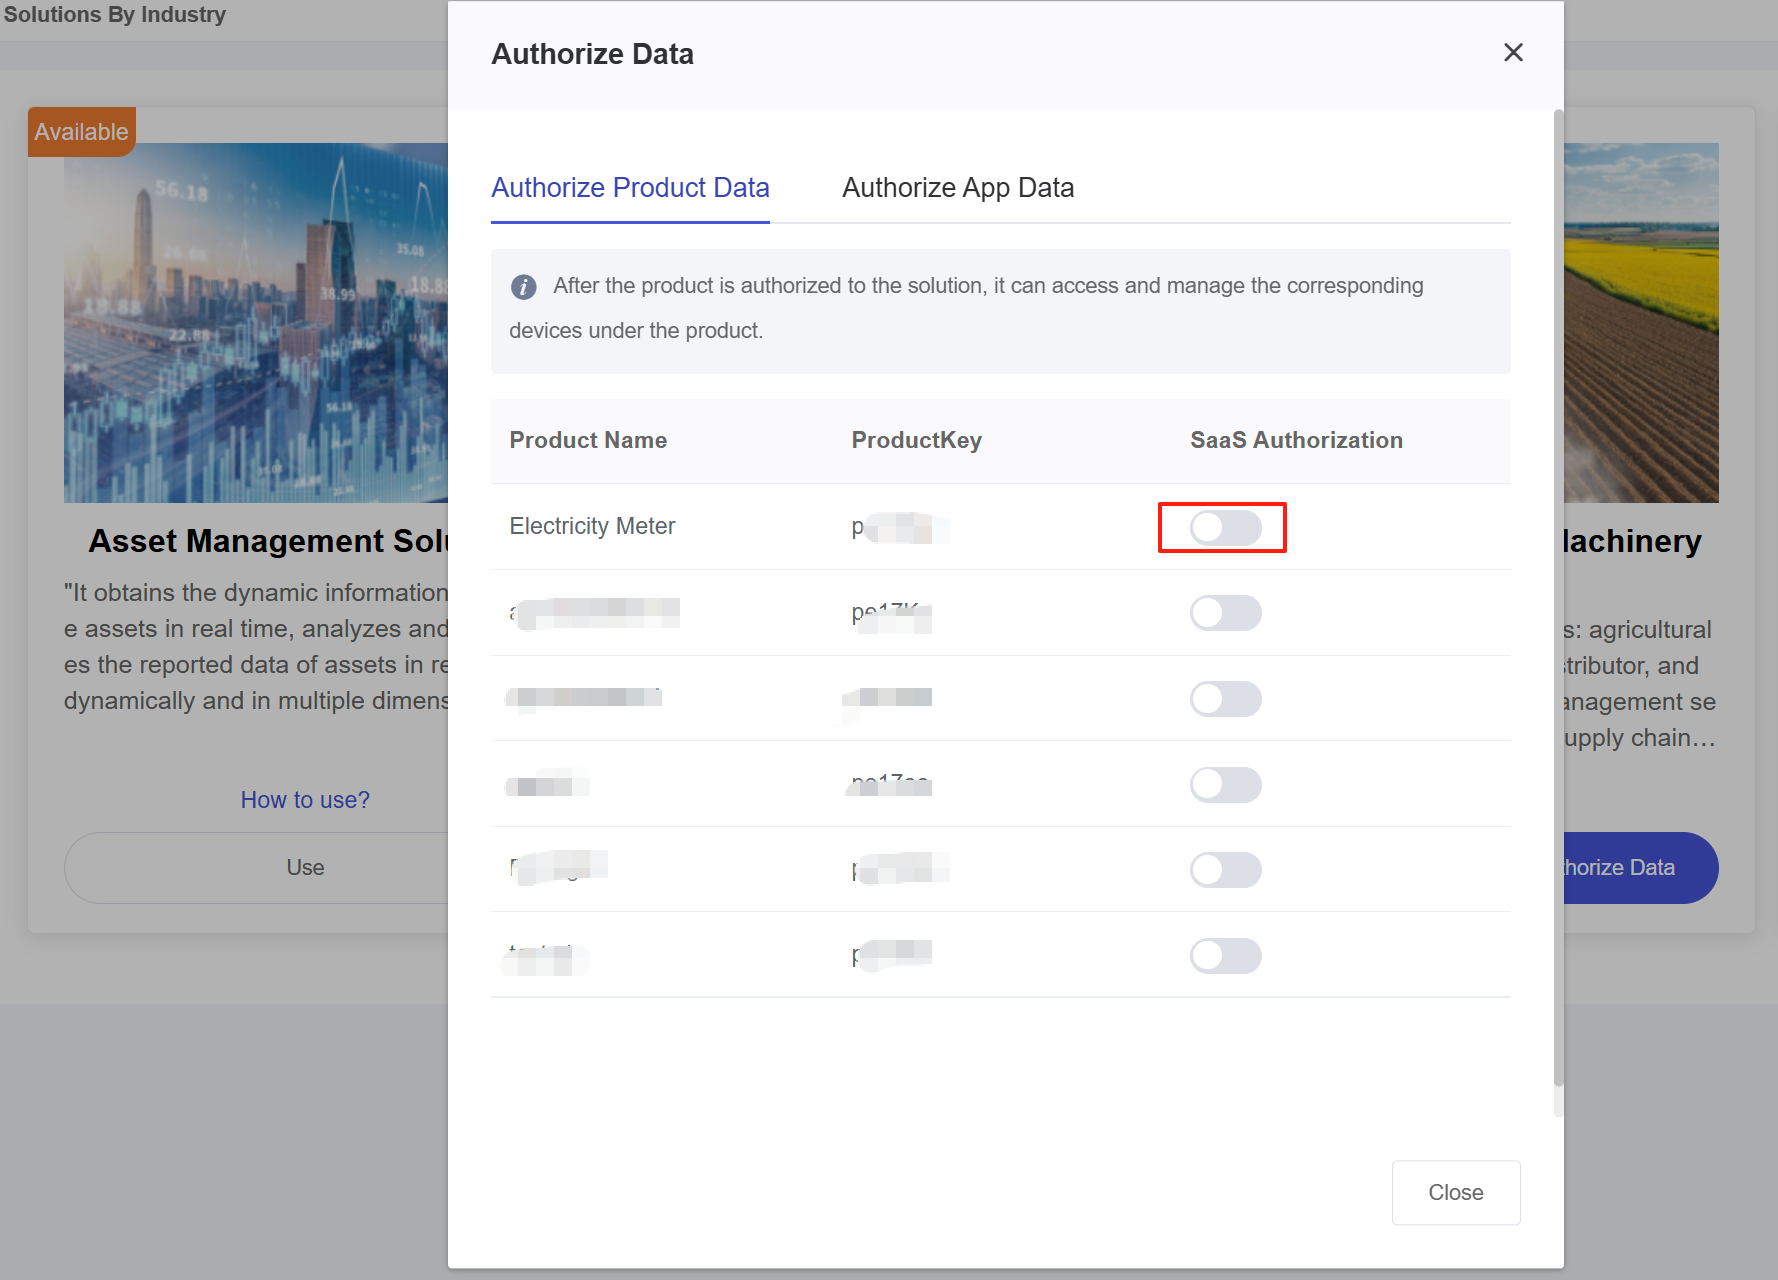
First, apply for the Asset Management Solution in the Developer Center’s “Solutions By Industry” section. Click “Activate” to submit your application. After an official review, you will receive a notification via email. If you get the approval, click “Authorize Data”, select the products you want to manage in the AMP and authorize them accordingly.
1.3.2 Create Product Subscription
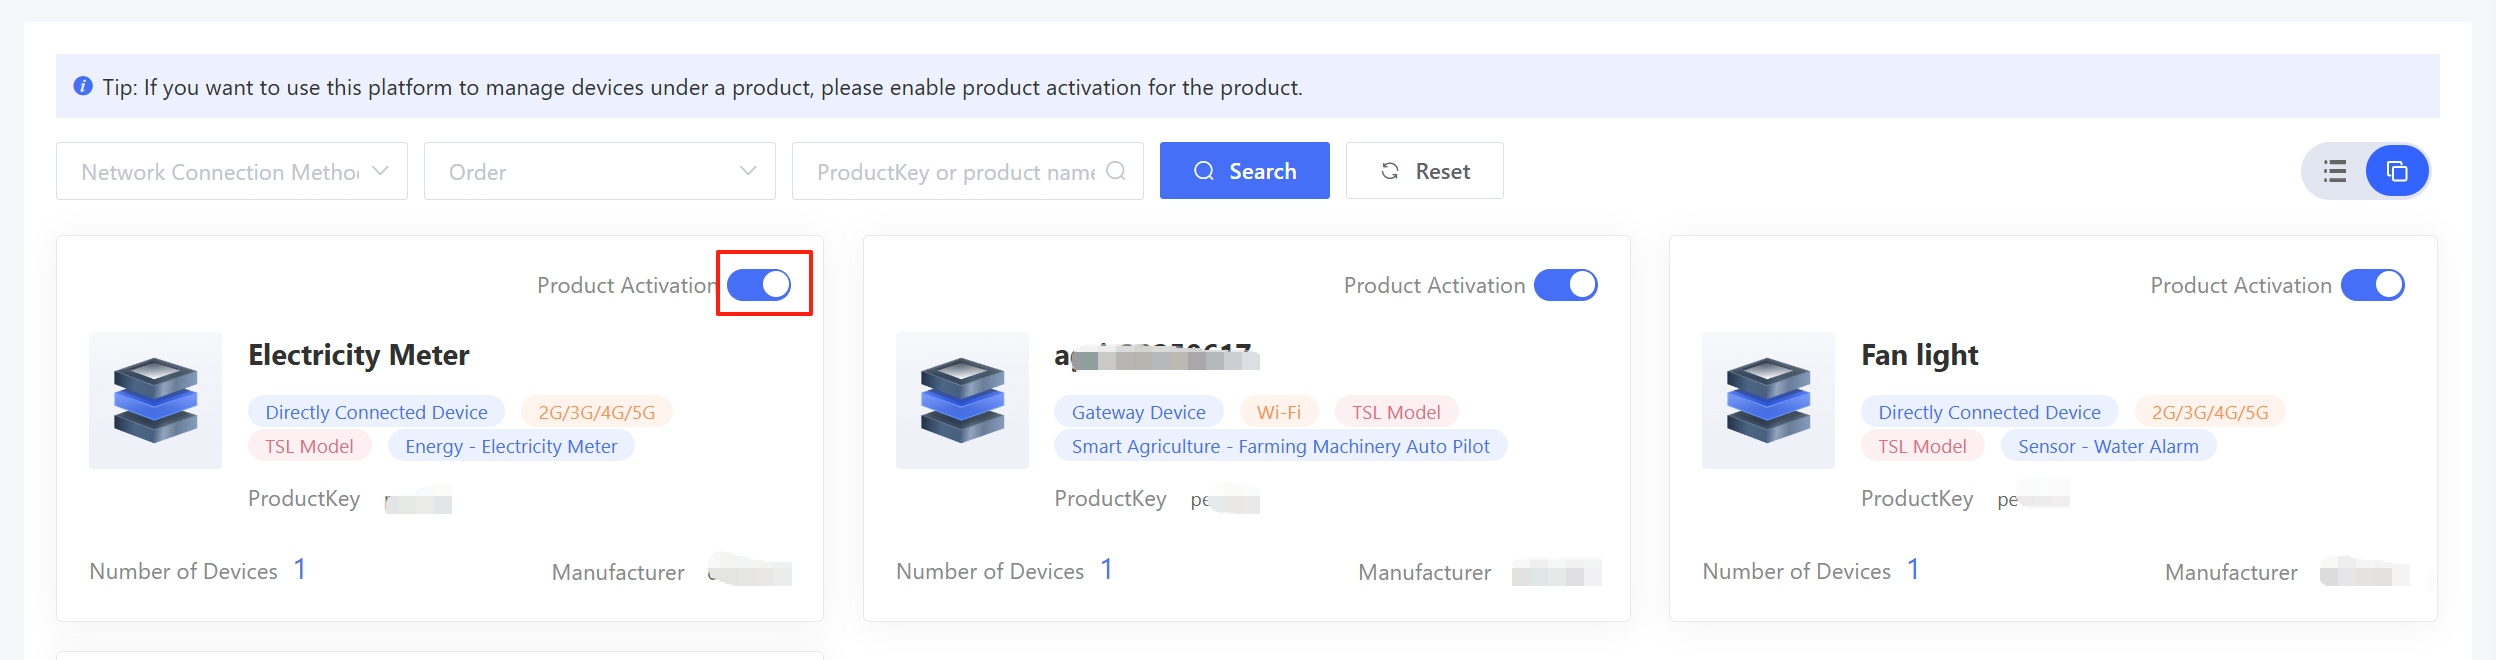
Products that have been authorized will be displayed in the “Product” menu of AMP. To manage devices under these products, ensure the “Product Activation” switch is turned on. Activating the product means the platform will subscribe to messages of the product, enabling real-time device data updates.
1.3.3 Device Import
AMP automatically displays the device information of those already connected to Developer Center in the device list. Note: If a device is online in Developer Center but not visible in AMP, the device can either report TSL data or re-online to trigger synchronization.
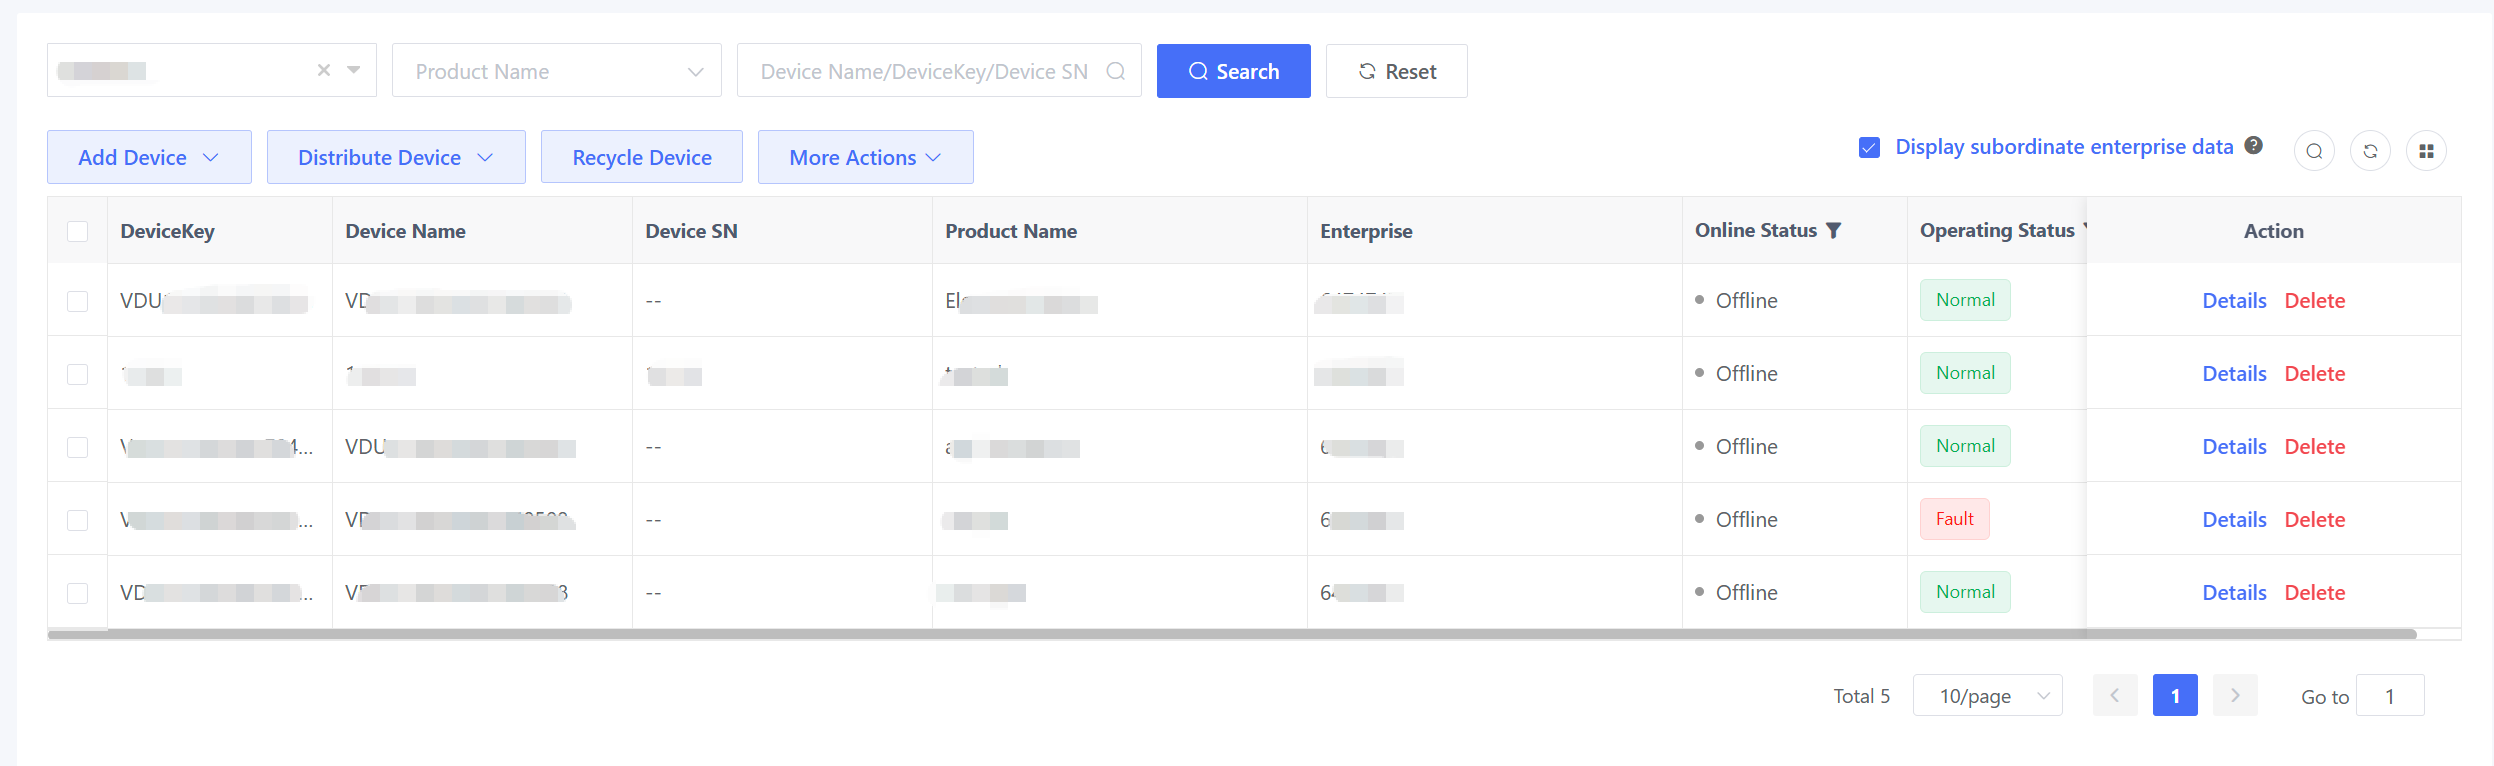
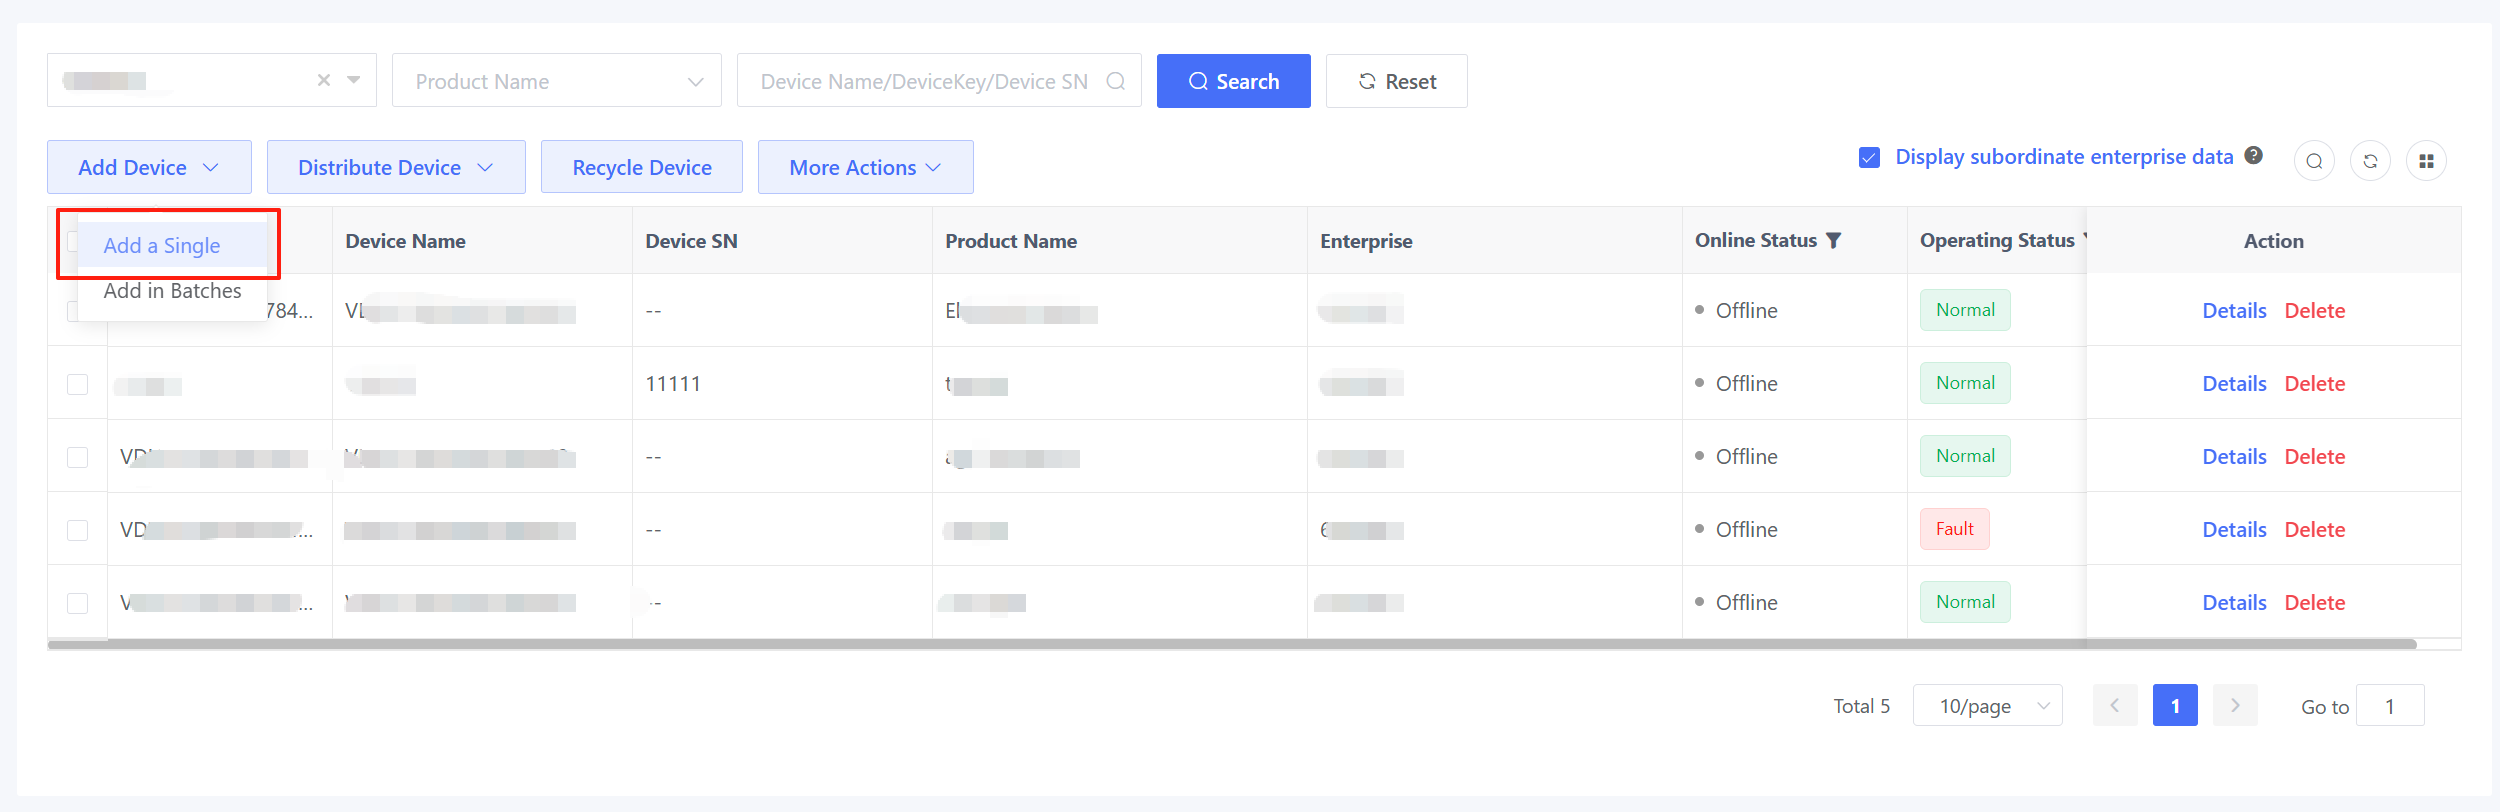
If you want to view a device in the device list before it comes online, pre-import the device through “Add a Device” or “Add in Batches”.
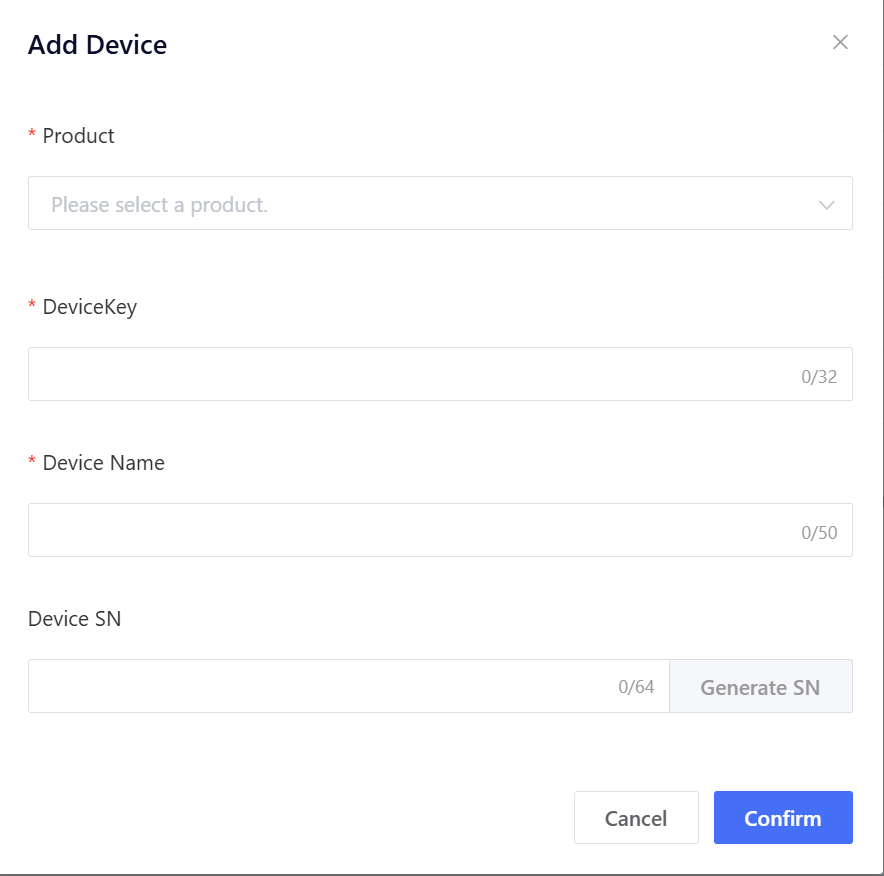
A. Add a Single Device
Click “Add a Device” to pop up the “Add Device” window, select a product, and enter DeviceKey and device name in the “Add Device” window.
B. Add Devices in Batches
Click “Add in Batches” to pop up the “Add Device” window, select a product, download the device import template and input the device information as needed, and then upload the device import file.
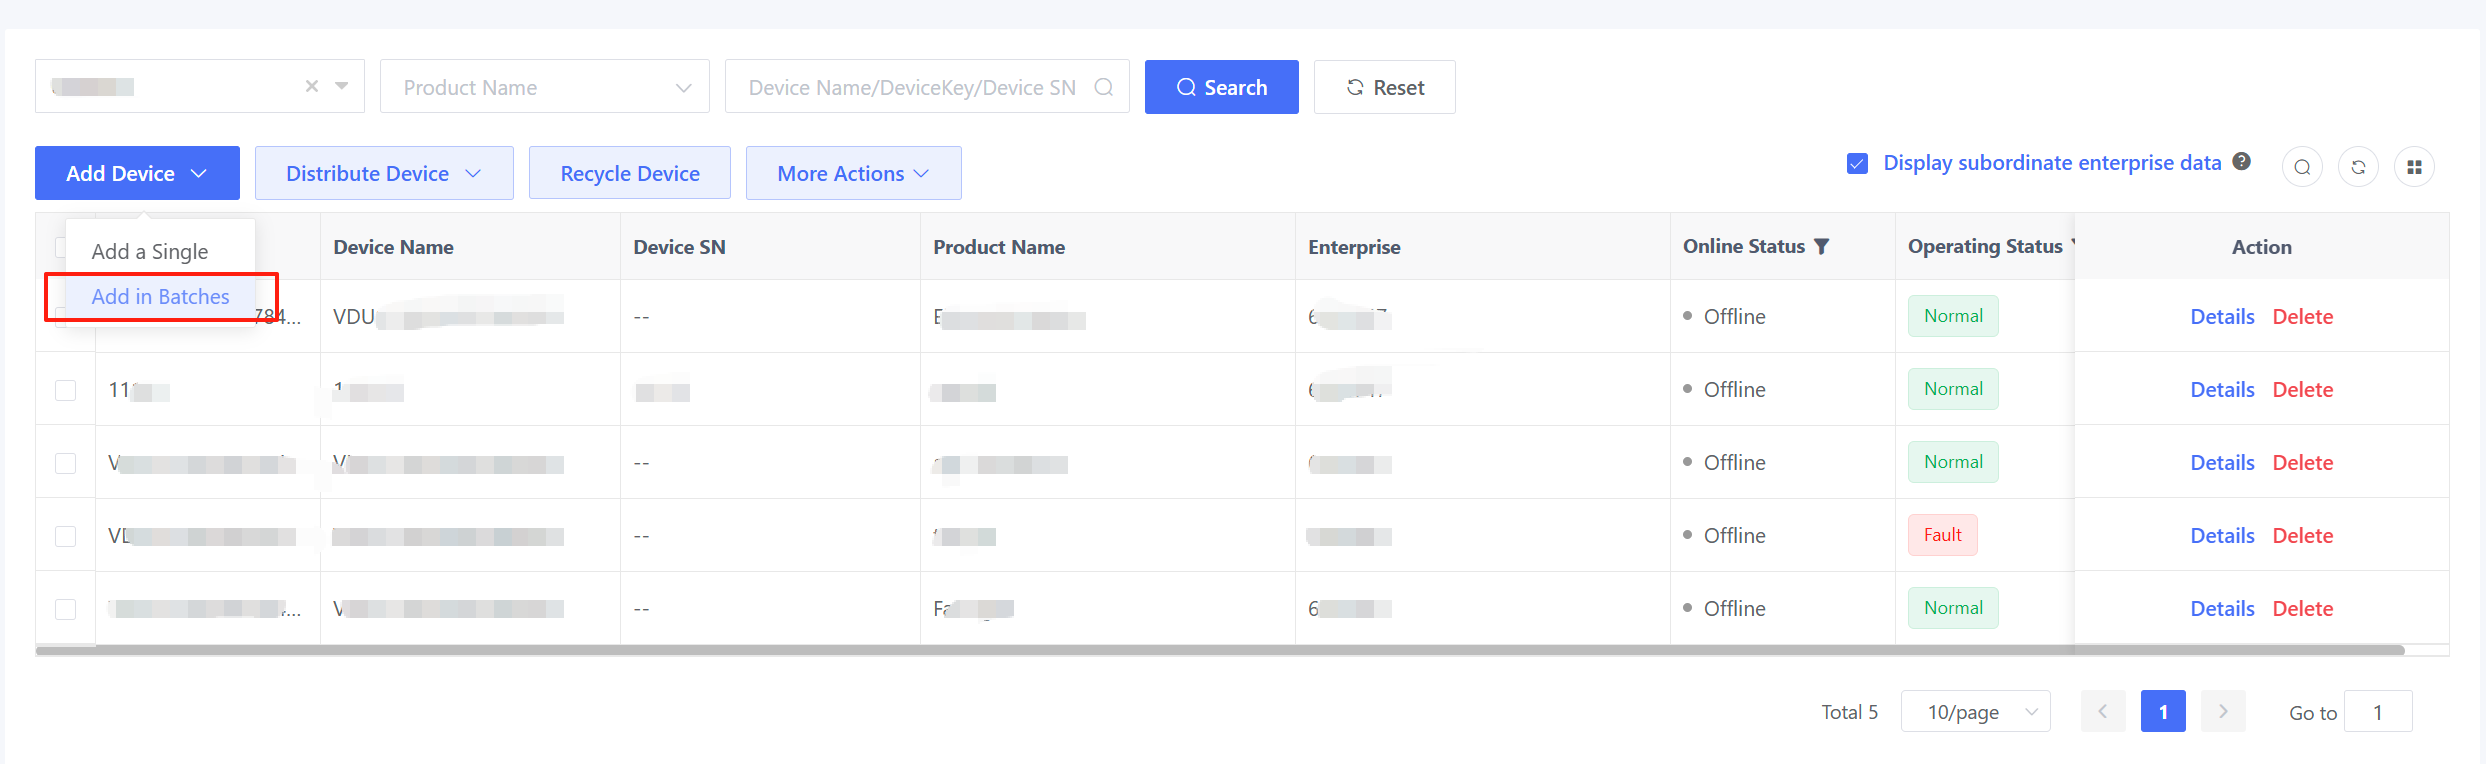

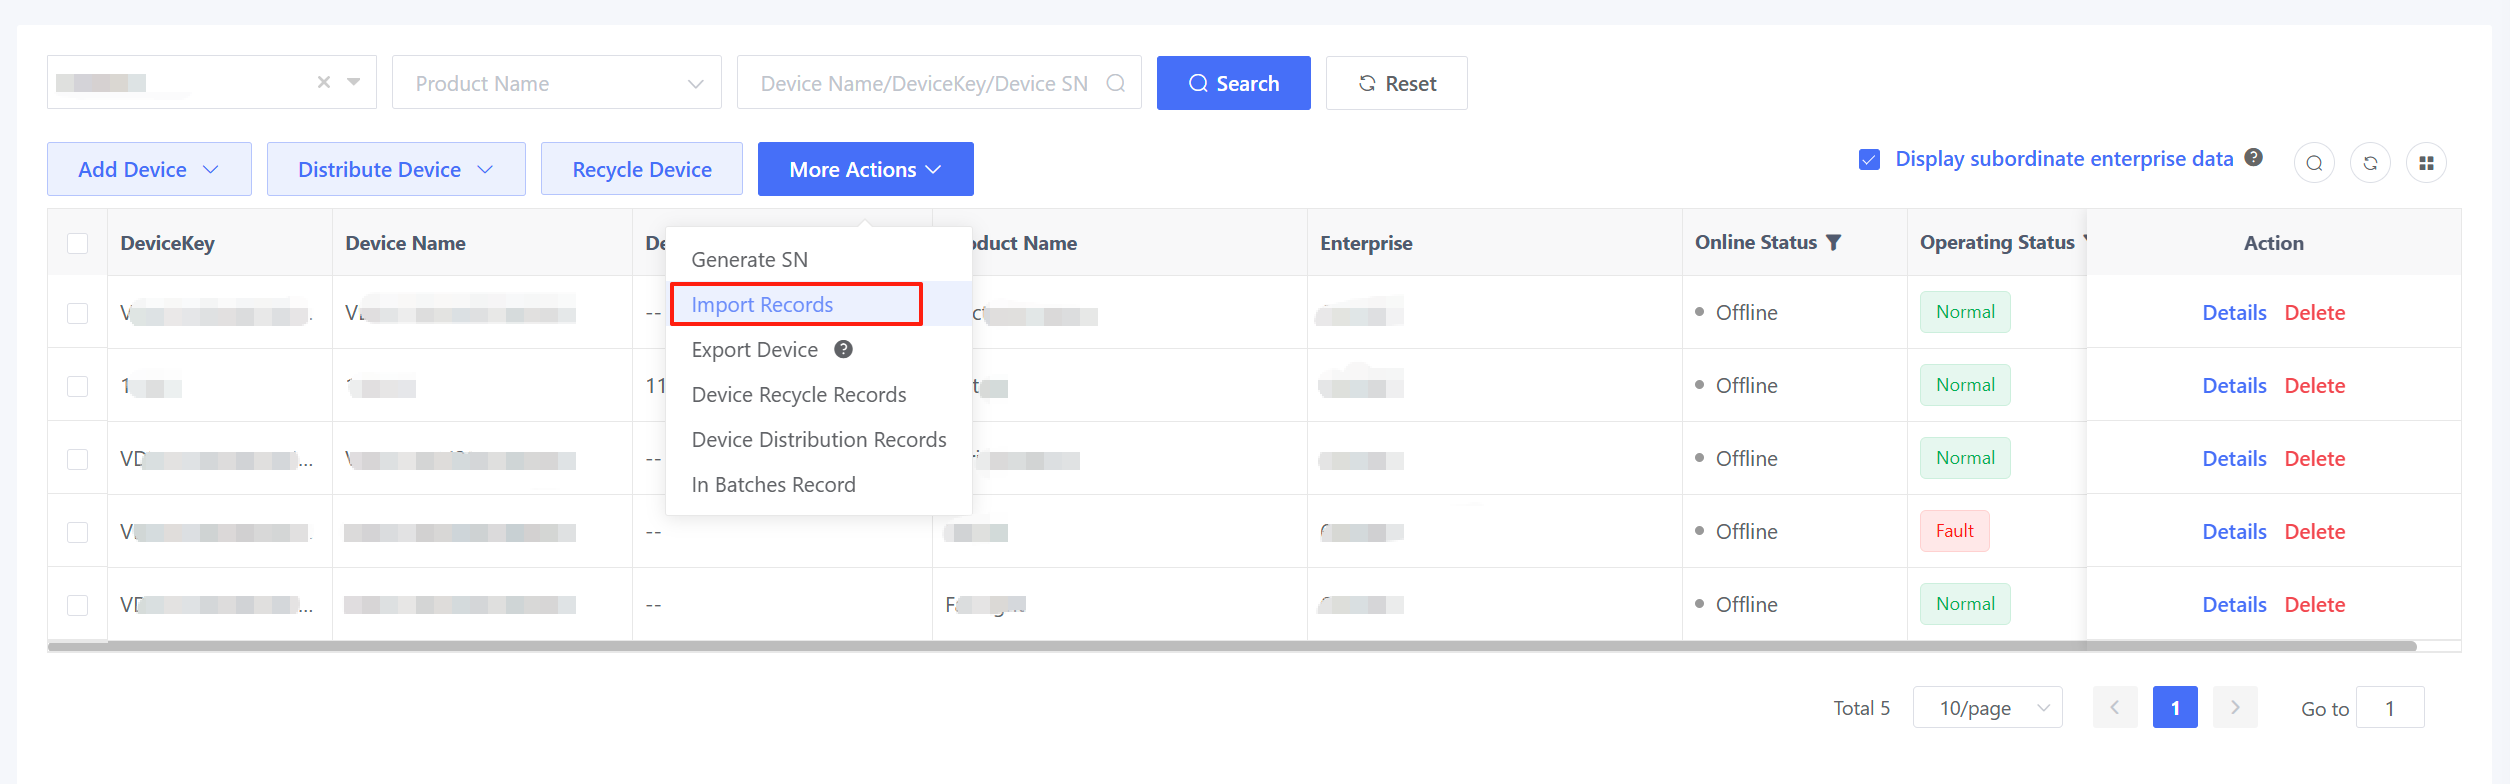
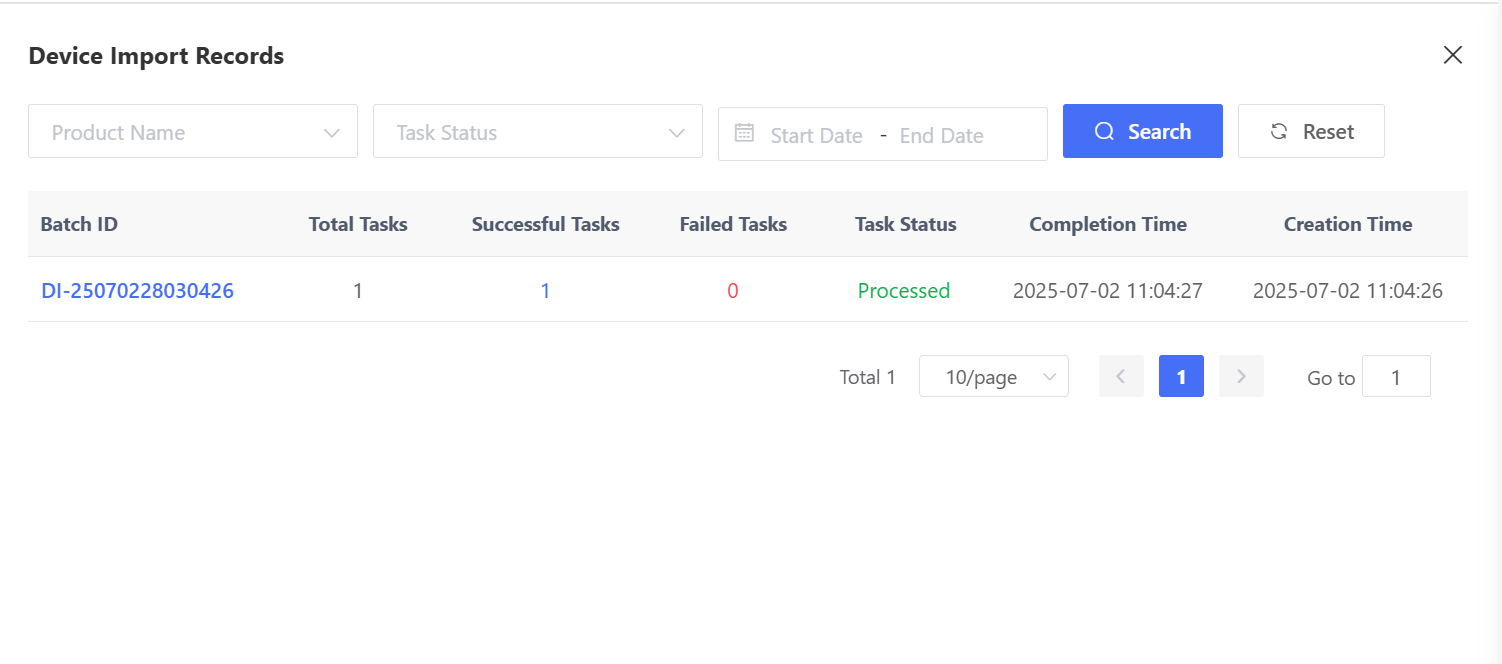
Device import is an asynchronous operation, so you can view the specific import results on the “Import Records” page.
1.3.4 Query Uplink and Downlink Device Data
You can view uplink and downlink data for devices on the “Device Details” page.
A. Uplink Device TSL Property
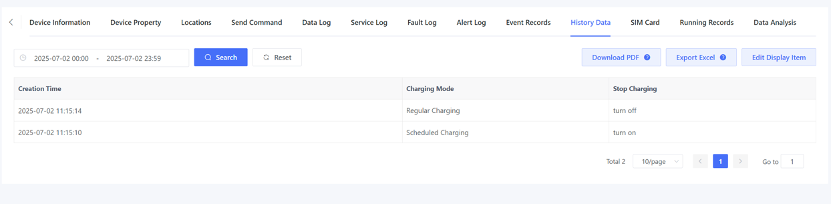
Go to “Device Details” > “History Data” page to view uplink property data. Since different products may have different numbers of TSL model features and display requirements, you can select which models to display. Click “Edit Display Item”, select the desired TSL model features, and save the settings. Only the selected features will be displayed in the history data list.

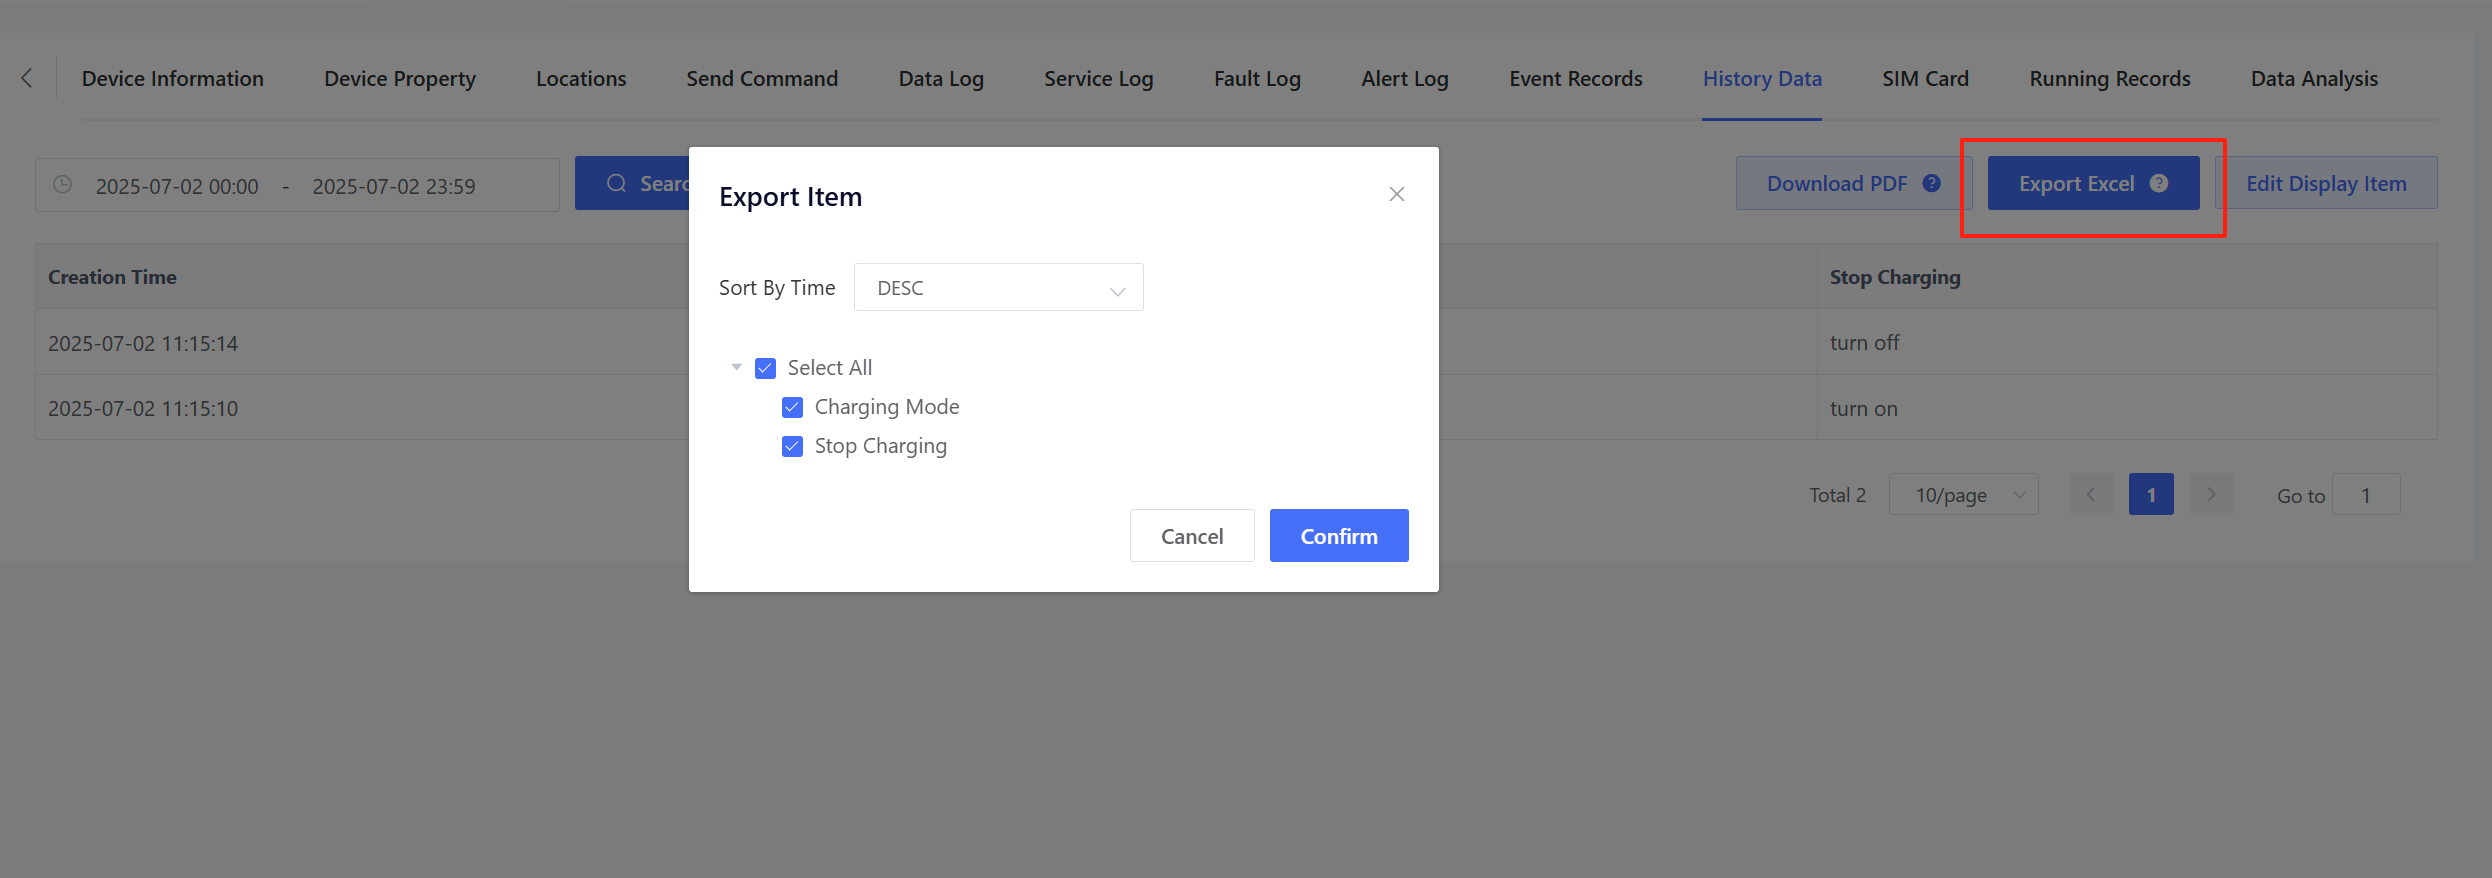
History data for the selected features can be exported as an Excel.
B. Uplink Device TSL Event
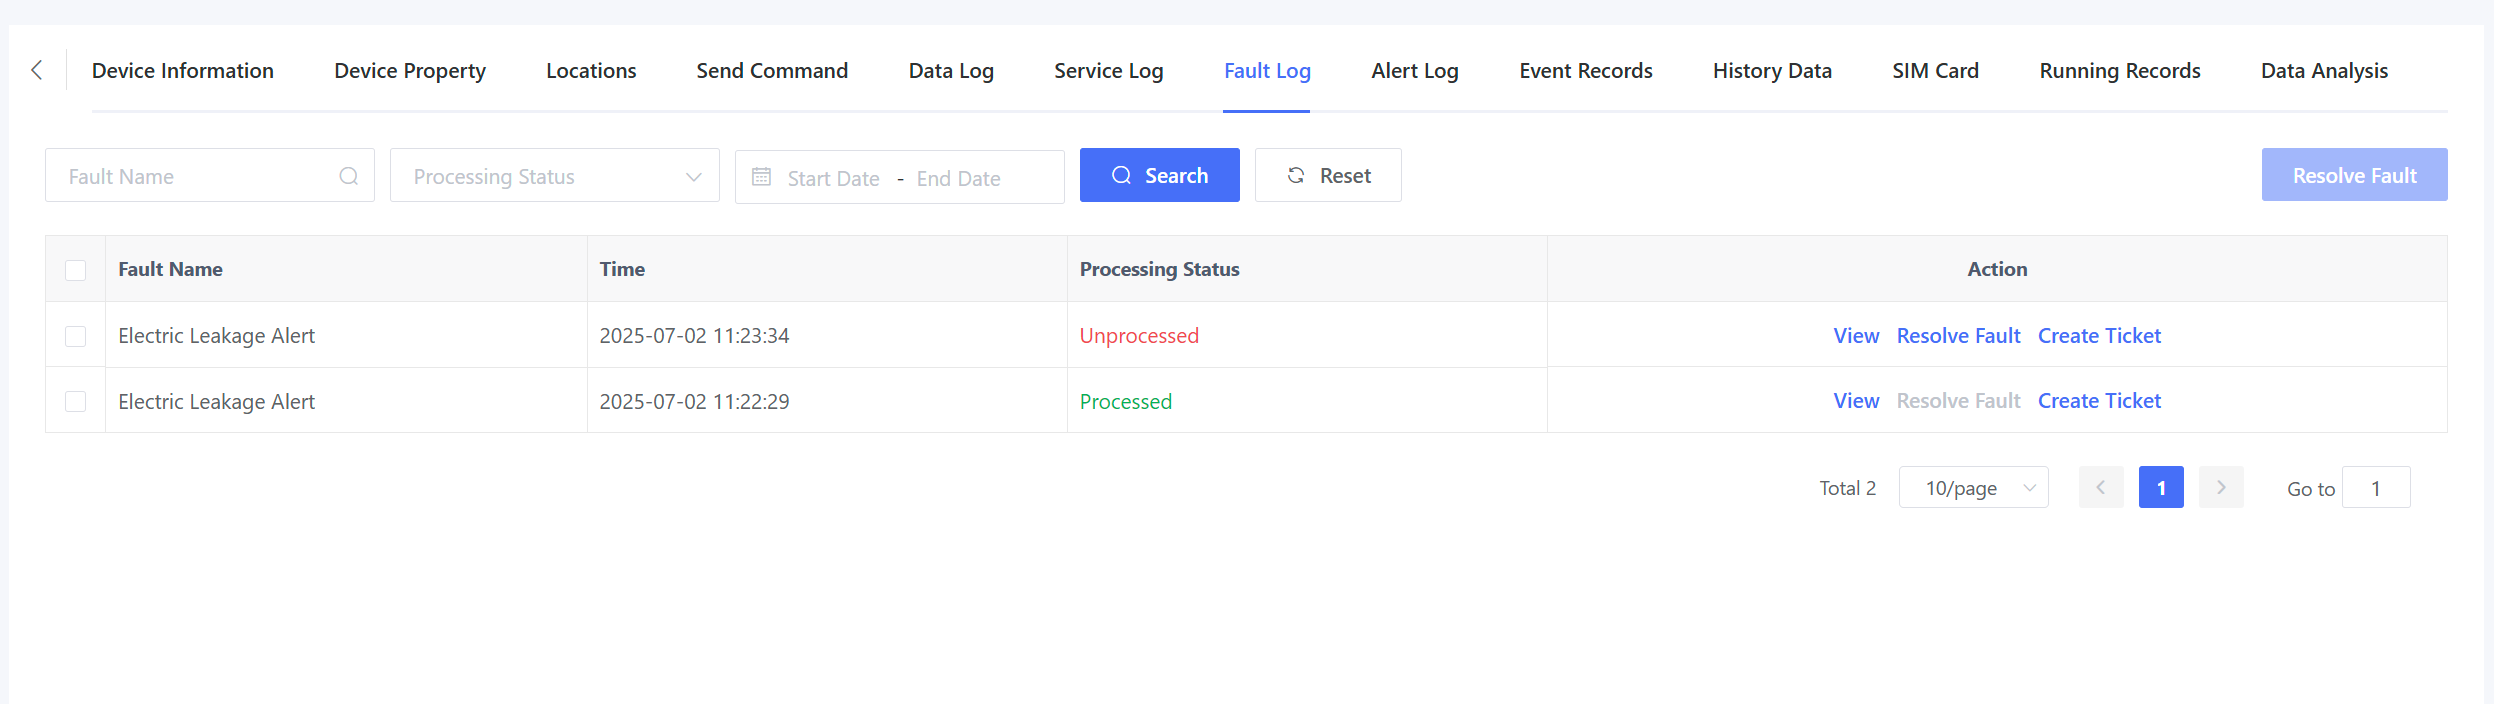
Go to “Device Details” > “Fault Log”/ “Alert Log” page to view alerts and faults reported by the device.
Go to “Device Details” > “Event Records” page to view events reported by the device.

C. Downlink Device TSL Property
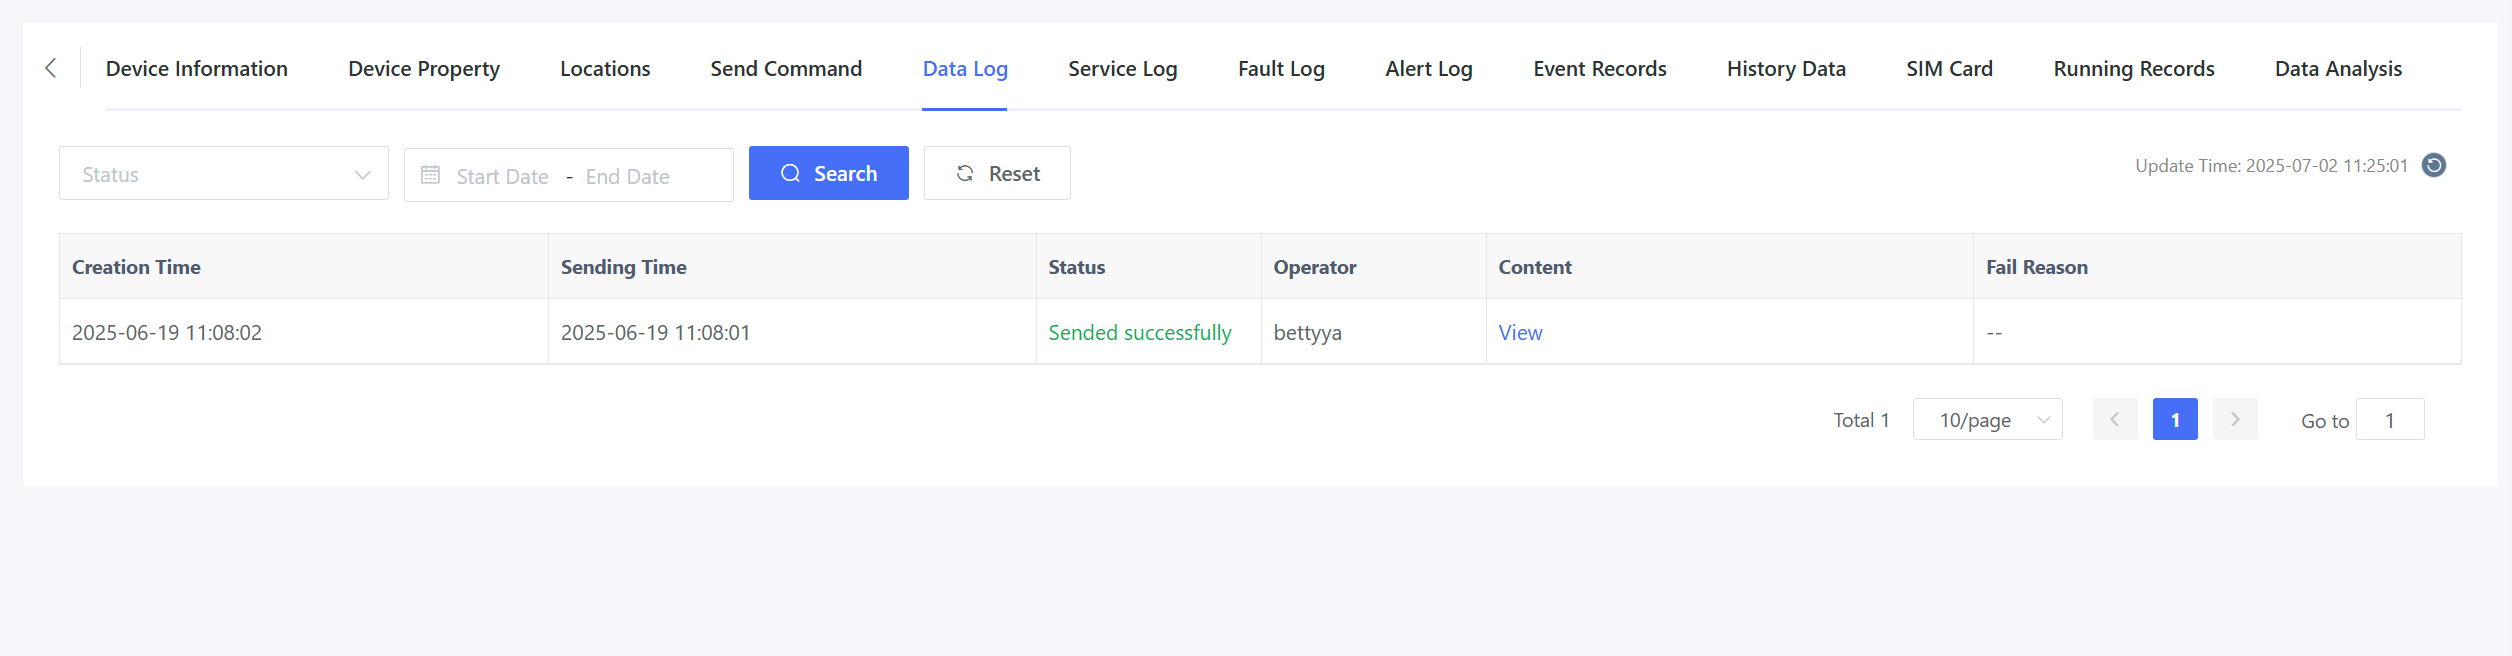
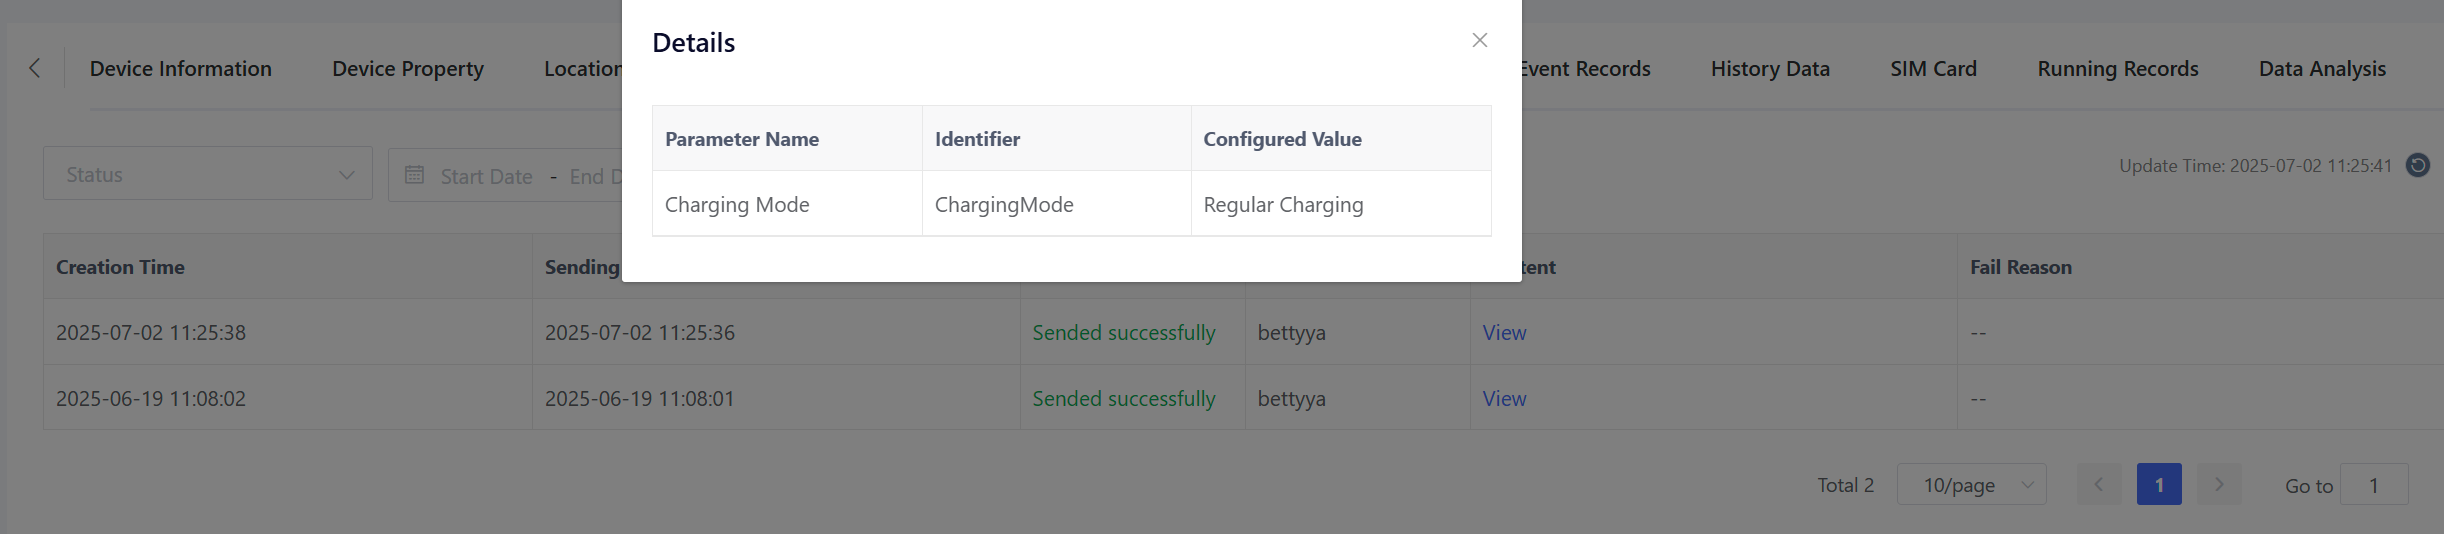
Go to “Device Details” > “Data Log” page to view records of property controls sent from the platform. Click “View” to check the specific parameter in each command.
D. Downlink Device TSL Service
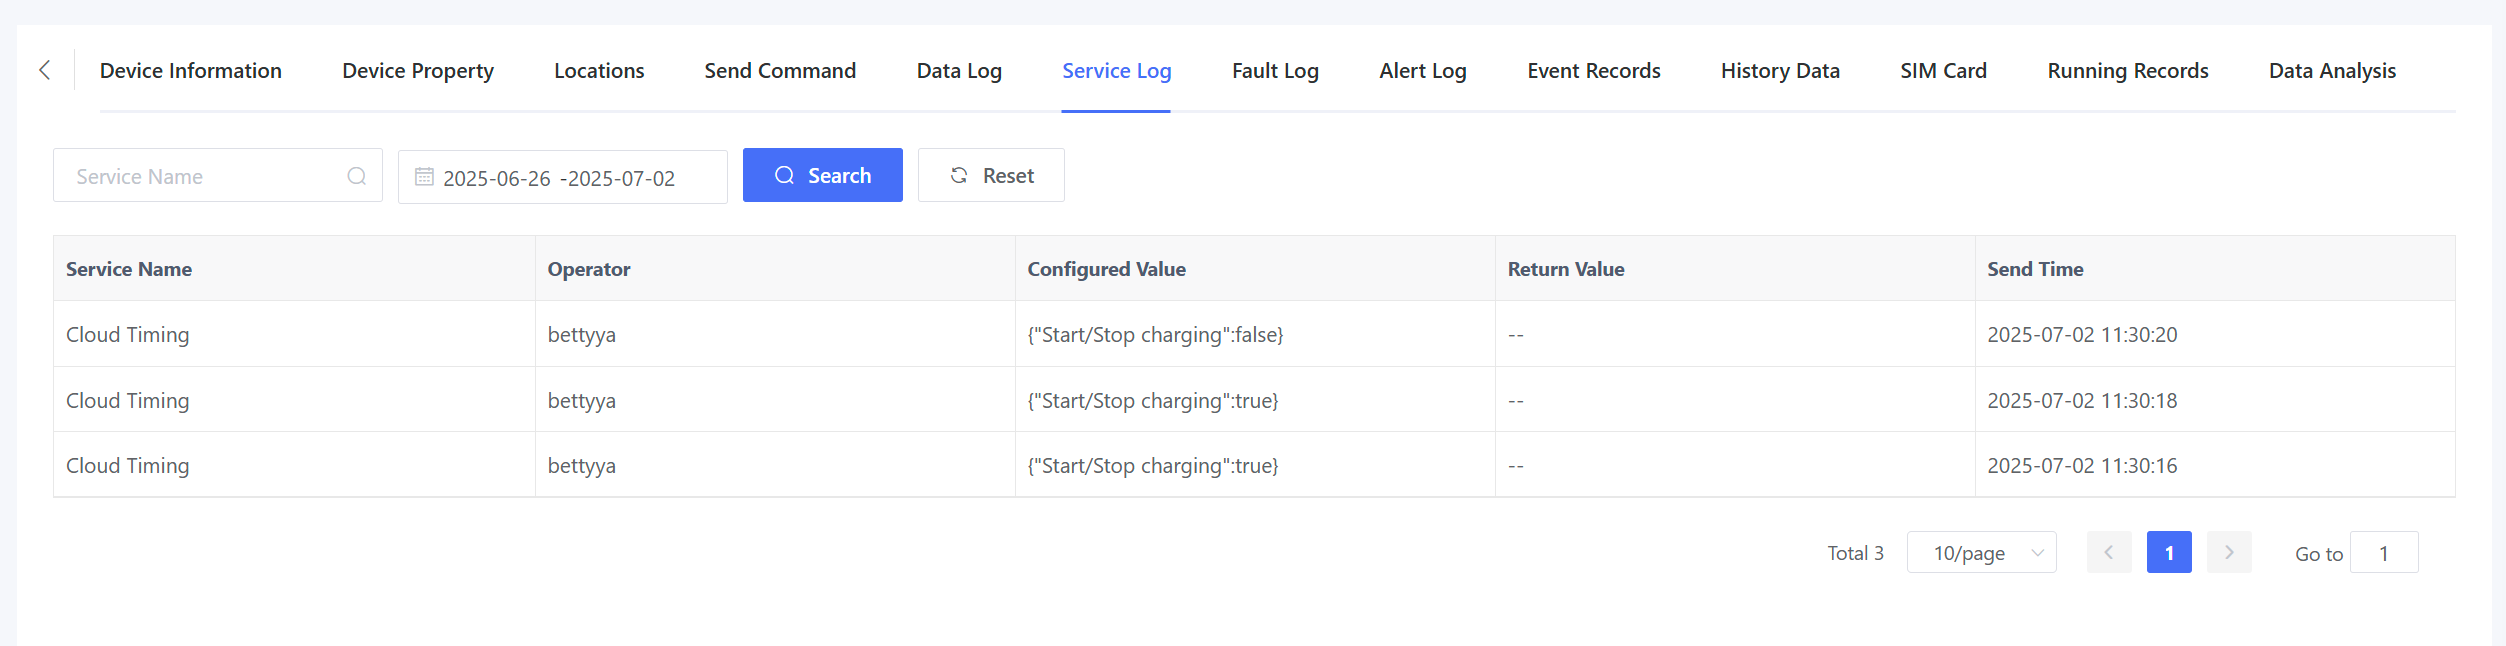
Go to “Device Details” > “Service Log” page to view records of service calls initiated from the platform.